POBER SUPER ACE CONSTRUCTION LOG
PROJECT PROGRESS - PART I
The following was taken from my original project notepad. This initial work was preparing the rought-cut Sitka Spruce into spars, rib members, and turtledeck stock and assembling about 75% of the ribs.
Date Description Hours
Cost
April 1996 Bought plans $104.50 5/13/1997 Bought sitka spruce sample from Wicks $17.66 Made rib jigs 2 12/17 Bought sitka spruce from Paxton $279.45 1/15/1998 Cut spruce into spars and other pieces 8 1/17 " 2 1/22 Bought plywood and epoxy from Wicks $101.42 1/29 Cut rib nose blocks 2
1/30 " 2 1/30 Rib work 1 1/31 " 0.5 2/1 " 1 2/2 " 0.5 2/3 " 0.5 2/4 " 1 2/6 " 0.5 3/1 " 1 3/9 " 2 3/10 " 0.5 3/18 " 0.5 3/19 " 0.5 3/27 Bought nails $30.00 3/28 Rib work 0.25 3/30 " 0.5 4/1 " 0.5 4/10 " 2 4/12 " 3.5 4/13 " 2 May 1998 MOVED 7/27 Rib work 1.75 8/3 " 2 8/23 " 1 9/10 " 3 9/10 " 1 9/14 " 1 9/15 " 2 9/16 " 1.75 9/17 " 1 9/21 " 1 9/29 Wing dry assembly 1.5 9/29 " 2 October 1998 PROJECT SUSPENDED Subtotal 53.25
$533.03
11/4/2000 Moved project to intermediate storage
PROJECT PROGRESS - PART II
January 14-20, 2001 [ 5.25 hours, 58.5 total ]
I moved the fabricated ribs and the spars from my intermediate storage (my Grandmother's garage in Du Quoin) to my basement in Murphysboro. I took inventory of the ribs and found that several are incomplete or damaged. I need to build 11 more out of a total of 28. Although, I did have enough to start assembling the left wing.
When I started this project, I used three rib jigs initially. I didn't use 1/4" nails to hold the gussets on but let the rib cure in the jig. This way, I built three ribs at a time. I later added the nails as I thought they were there for structural support. This is wrong, they are only there to hold the gussets while the epoxy cures, some people actually remove them. Anyway, the difference in the jigs shows. The distance between the spar openings are different for all three jigs and the trailing edges are random. I took all the ribs for the left wing, lined them up by the front spar opening, and clamped them together. I numbered them by what jig each was made from and drew a straight line across the trailing edges up to the shortest rib. I then sanded off the trailing edges to the line. I grouped the ribs so that all the ribs from one jig would be together on the wing.
The raw spruce stock that I had was rough-cut 4/4 boards. Since I did the planing, I was able to make the spars 15/16" as opposed to 3/4". The rib jigs were built to compensate for this.
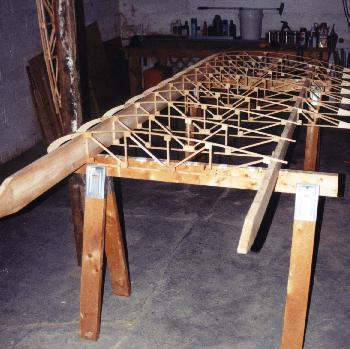
I did notice that a few of the spars are cupped slightly so I sanded them a little. Using two sawhorses, I positioned the spars for the left wing and slid the ribs into place. The trailing edge is straight and everything initially looks good.
Thursday, I reviewed what was not complete with the total ribs. Why I stopped where I stopped a few years ago is starting to come back to me. I ran out of 1/4" stock, the 1/4" nails, epoxy, and I cut gussets only as needed. Since I wanted to try building ribs without the nails, I decided that I need a newly designed jig. I spent a few hours on the redesign and fabrication.
Friday, I cut 1/4" stock to finish the project. Before I started, I sorted through the pile of spruce to determine the turtledeck sticks and 3/4" stock for the compression ribs.
My cheap tablesaw has a large opening in the table for the blade. It is fine for cuts larger than 1/2" but anything smaller has no support. I used some 1/8" plywood (which fits under the fence) to create a "zero-clearance" blade opening, this worked very well.
January 21-27 [ 4.0 hours, 62.5 total ]
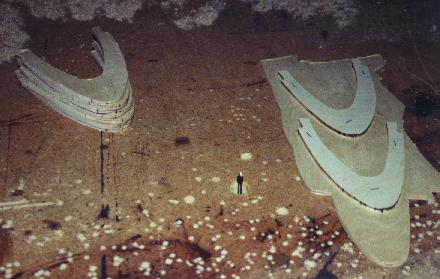
I only had three of the 1/4" plywood nose blocks left and a dozen more ribs to make. Using a pair of the blocks as templates, I pattern cut several more using my router and a 1/4" panel bit.
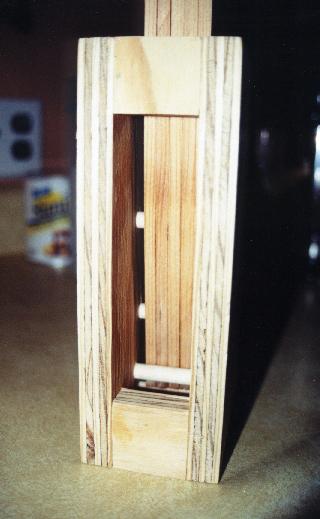
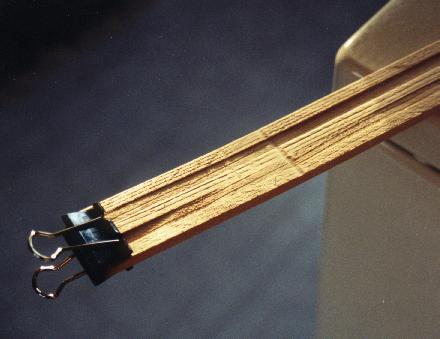
The pattern block, which are stapled to the plywood at the right, are used as a guide for the router bit which sticks up through the table. The bit, which is hard to see, is just down from the center of the picture. Monday I built a capstrip bending jig which was a simple open box with dowel rods inserted. The dowels were located such that a capstrip is slid in between the dowels and the curve is formed. I boiled five capstrips for about an hour and then put them immediately in the jig. They then set overnight. The only problem is that the dowel rods left indentions in the capstrips. The jig should have a curved block to provide continuous pressure as opposed to a point load.
My first capstrip bending jig. The capstrips, although curved, had indentions from the dowel rods. I ordered T-88 epoxy and 1/4" nails from Aircraft Spruce & Specialty. They should be here in a couple of days.
Tuesday, I cut stock and gussets for five ribs. I can't do much more until I get the epoxy.
Saturday, the epoxy showed up so I started with the ribs.
Epoxy and nails: $35.75
January 28-February 3 [ 1.5 hours, 64 total ]
Rib work.
February 17 [ 1.5 hours, 65.5 total ]
Rib work. (Nothing like a cold and a sinus infection to stop progress.)
February 18-24 [ 6.5 hours, 72 total ]
Rib work.
I decided that the back ends of the innermost ribs where the pilot access cutout is can be done in plywood. This way, I can use the aileron ribs and the current jig. Actually, the ribs at the wing root I will do in solid plywood. In other words, I am almost done with the ribs!
Got a break Saturday, my wife and sister went to the movies and I was left to work. I cut the plywood rib and rib sections for the innermost ribs and assembled the last of the truss ribs. After four years, all ribs are finished!
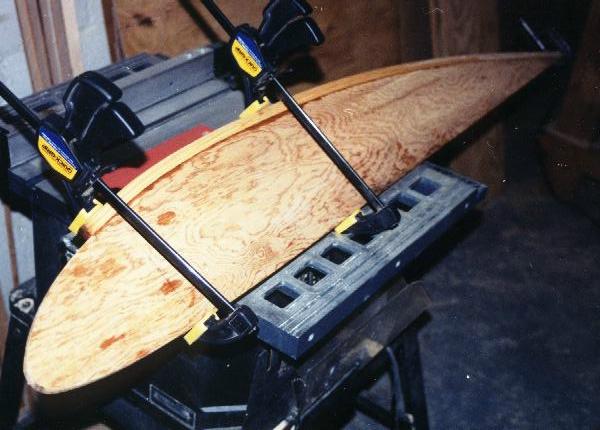
My alternative to a bending jig. I initially cut this plywood rib profile to build jigs around but it has come in handy for other purposes. I also used it to generate plywood rib nose and trailing edge patterns. In hindsight, the ribs would be easier to build if the trailing edge was plywood like the leading edge. This would cut out about 25% of the truss work at little to no added weight. Also, the truss or center section would be the same for all ribs.
About 55 hours were spent working on the ribs.
February 25-March 3 [ 2 hours, 74 total ]
Bought the 20 eyebolts for the wing panel drag wires.
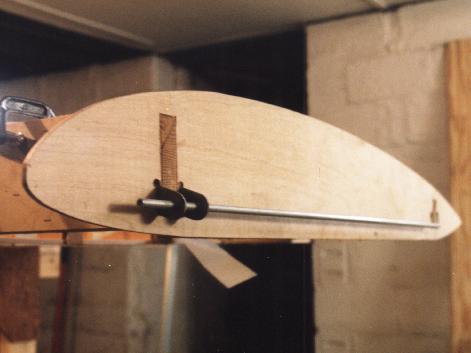
The inboard plywood rib connection to the spar was made with a tennon. I initially had two choices: glue the rib to the end of the spars or cut a hole and slip the rib over the spars. I was worried that the butt connection would simply peel the outermost veneer of plywood off and the hole method would leave only a 1/4" stip of plywood around the spars to connection the three rib sections. I decided to cut a smaller hole in the ribs and mortise the spars to fit.
Purchased eyebolts, nuts, and washers: $13.94
What a fiasco! I loaned my welder to a friend and it's been in his garage for a year. No big deal, I didn't have a place to put it anyway. Saturday, I went to his house (about 15 miles) to weld the eyebolts closed and no welding hood. Off to the closest hardware store that has welding equipment (about 15 miles) and bought a hood. Back to his house (about 15 miles). Weld two eyebolts and run out of wire! Curse! Back to the store (about 15 miles). Return to his house, put the welder in my truck and haul it home (about 15 miles). There is something to be said about keeping your tools under your care.
March 4-10 [ 6 hours, 80 total ]
Purchased 3/32" wire: $7.50
Set the welder up in my basement near the cellar door which included wiring a 220V outlet. Welding the bolts only took about an hour, including wire brushing the welds. I used a MIG welder with .023 mild steel wire and C25 gas. I was curious about the cost of buying cast eyebolts and looked in the Granger catalog. They do have forged 1/4" x 5" eyebolts at $4.08 each for a box of 10. That would be $80.16 for the score. If you don't have the time to find your welder, that may be an option.
I ordered 4130 steel from Aircraft Spruce & Speciality. They sent me a parts list for the kit and I have been using it as an order cheat sheet. Although, they list the .090 thick steel as a sheet which you would cut into 1" strips. I ordered the 1" strips x 6 feet long and bought enough for the wing attachment brackets and the drag/anti-drag brace wire tangs in the wings.
Purchased 4130 for the wing attachment brackets: $62.26
What a crock, $37.05 in parts and $25.21 in shipping and handling charges! I learned my lesson here, buy in bulk and drive to Highland to pick it up.
I found two Subaru EA-82 engines in a junk yard I made a deal for both for $300. They looked to be in good shape. Saturday, my friends and I headed over to pull the engines. After working most of the morning, we found that one was sized, the other had some broken parts. I was told that they were good but this surely wasn't true. We just packed up and left. I am rethinking the idea of using an auto conversion and will be checking the local airport for anyone who may have a O-200. There is a flight school at SIU and they wreck a 150 every few years. The engines almost always end up the A&P's in the smaller nearby airports.
April-May [ 0 hours, 80 total ]
I looked for an 0-200 and the company at my airport that salvaged parts has gone out of business. Fortunately, the hanger was rented to a group of ultralight pilots and I got to meet them. I have made a decision about which engine and it will probably be a VW conversion from Great Plains in Omaha.
Meanwhile, I have been working on my Model-A.
June 23-30 [ 5 hours, 85 total ]
Glued and nailed the compression ribs of the left wing. I am now committed to always having this wing assembled.
Cut and glued in the compression braces. The lower brace on the root end rib must be located flush with the bottom of the rib to allow clearance for the wing connection bracket.
Cut and glued in the drag/anti-drag blocks. The plans show to use these on the front spar only and use metal tabs on the rear spar. Otherwise, the block and bolt will show at the aileron. That doesn't bother me as I plan to use a gap-seal strip.
July 14-16 [ 2.5 hours, 87.5 total ]
With the left wing partially assembled and twine being used as drag/anti-drag wires, I thought it would be a good idea to assemble the right wing to this point. I would then be able to place both wings together and square them at the same time. This way I could see the leading edge across both wings. I wasted an hour straightening up the basement so I could store the left wing while I worked on the right.
As done on the left wing, the spars had to be sanded some and the ribs filed for the assembly of the right wing. Everything looks good.
July - October [ 0 hours, 87.5 total ]
No real progress on this project, I've been working on my Model-A. I have done two main things:
One; I determined that the engine of choice was a Model-A engine because the original was designed around it. The plans I have are for a C-85 and I knew there had to be an alternative. I reviewed my Air Camper plans concerning the engine conversion and purchased a rebuildable engine.
Two; I tracked down the original plans drawn by Corben from the EAA. The Pober plans are extremely similar so I will be able to modify my project for the Model-A.
Model-A engine: $150. (with carb, water pump, oil pump, head, crank and pistions... what a deal!) I have also begun looking for a magneto and think I have found one that is a military surplus.
November [ 7 hours, 94.5 total ]
Worked on the right wing and glued in the compression ribs, pull-blocks, and strut fitting plywood. Only the compression ribs are glued at this time. All others will be glued after the drag and antidrag wires are installed so they can be adjusted for clearance.
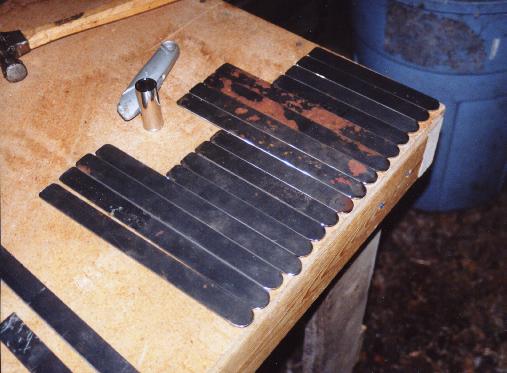
I cut the 1" 4130 flat bar into the strut fittings. I started with two pieces of 6' and one piece of 3' and now have 16 pieces and some leftover. I cut the bar using a air driven cut-off wheel and a bench grinder for finishing. To create the radius, I used a 19mm socket as a template and scored a line. I then used the cut-off wheel to trim the corners and finished with the bench grinder. The plans show both ends to be radiused but I only broke the corners on the end that is hidden in the wing.
I marked the drill hole locations using a scale and an utility knife and drilled the holes. I got satisfactory results with an electric hand drill, stacking the fittings in piles of four, and drilling a 1/8" starter hole first.
Even 4130 rusts. It will be sandblasted off before painting.
December [ 5.5 hours, 100 total ]
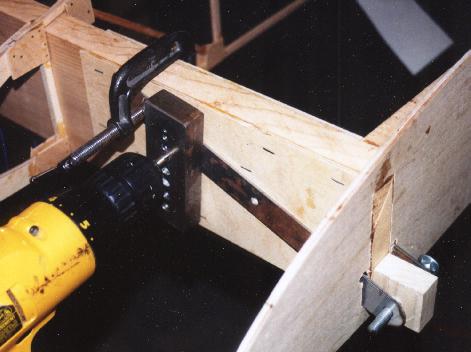
Finished the metal wing fittings. I used the fittings and a drill guide that a friend made for me and drilled the holes in the spars. The plans show to measure and predrill the holes in the spars but I'm sure I would be a fraction off and the fitting holes wouldn't line up. I chose to use the holes in the fittings for positioning. With the drill guide, I was able to drill straight through the spar and meet perfectly the fitting on the opposite side every time.
The drill guide my friend made is simply a flat steel block with different sized holes drilled orthoginally. Notice the positioning block at the attachment point with the bolt pushed through. This block was cut and positioned so that the bolt hole location would be located as shown in the plans. A 5/16" tube inserted into the bolt holes verifies alignment. I installed the all the wing root fittings and bolted the two wings together. The wings lined up and I have the confidence that these fittings will provide me an aligned wing. However, I did locate the positioning block wrong and the left wing is higher than the right by about 1/8" when bolted together. Fortunately, it's equally off for the front and back fittings so there is no difference in angle of attack between the wings.
I disassembled the wings and removed the metal parts for painting.
Purchased nuts and bolts: $3.24
Purchased spar urethane: $13.01
Spring 2002
After much thought and consideration, I have come to the conclusion that I do not feel comfortable with the craftmanship of this project. I have learned a lot on airplane construction and woodworking during the time I have had this project and know that my skills now are far and above what they were when I started. I therefore disassembled the wings down the the spars and saved the hardware for another project. This time, maybe I'll finish my Slingshot or start on an AirCamper or a Volksplane.
